xoss g+ gps not working is a common concern many users face. If you’re grappling with this issue, know that you’re not alone. This article provides a detailed, step-by-step guide to help you troubleshoot and resolve this prevalent problem.

Pixabay, CC0, via Wikimedia Commons
Understanding the Issue
The “xoss g+ gps not working” problem can be perplexing, especially when you rely on GPS for crucial tasks like navigation. Several factors can contribute to this issue, including software glitches, hardware malfunctions, or external interferences such as tall buildings or dense tree coverage that might hinder satellite signals.
Moreover, internal factors like outdated software or physical damages can exacerbate the issue. Hence, before jumping into solutions, understanding the root cause is imperative.
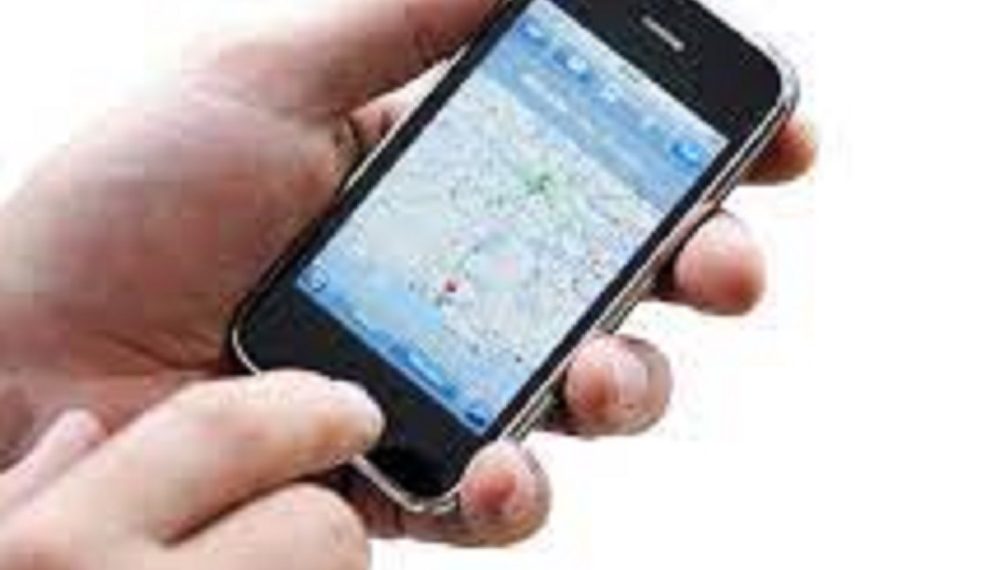
Step 1: Check Your Device’s Location Settings
The proper operation of the GPS system on your device is heavily reliant on its location settings. These settings govern how your device interacts with satellites, Wi-Fi networks, and mobile networks to pinpoint its position on the globe.
Ensuring these settings are correctly configured is the foundation of troubleshooting GPS issues.
Understanding Location Settings
Modern devices come equipped with multiple methods to determine location:
- GPS: This uses signals from satellites orbiting the Earth to triangulate your exact position. It’s highly accurate but can be slow to establish a connection, especially indoors or in urban canyons.
- Wi-Fi: Devices can estimate your location based on the range of known Wi-Fi networks nearby. This is faster than GPS alone and can work indoors, but it’s less accurate.
- Mobile Networks: By measuring signals from cell towers, your device can approximate its location. This is the least accurate method but establishes a connection rapidly.
Steps to Ensure Correct Location Configuration
Here’s a step-by-step guide to ensure your location settings are optimized:
- Navigate to the main settings menu on your device.
- Locate and select ‘Location’ or ‘Location Services.’
- Ensure that the location toggle is set to ‘On’ or ‘Enabled.’
- Review the location mode options. Typically, these include ‘High Accuracy,’ ‘Battery Saving,’ and ‘Device Only.’ For the best GPS performance, choose ‘High Accuracy,’ which utilizes all available methods to determine location.
- While in the location settings, it’s also a good idea to check if any power-saving modes or app restrictions might be hindering the GPS. Some devices have battery optimization settings that can limit the functionality of certain apps or systems, including GPS.
The Importance of ‘High Accuracy’ Mode
Selecting ‘High Accuracy’ mode ensures that your device uses a combination of GPS, Wi-Fi, and mobile networks to determine your location.
This multi-faceted approach usually results in faster and more accurate positioning. Especially in challenging environments, like urban areas with tall buildings or indoors where a GPS signal might be weak, leveraging Wi-Fi and mobile networks can be invaluable.
Step 2: Verify the Software Version
Software is the backbone of modern electronic devices, acting as the bridge between the user and the device’s hardware capabilities.
A well-maintained and updated software ensures optimal performance, security, and compatibility. This is especially true for functionalities like GPS, which rely on intricate software algorithms to deliver accurate results.
The Role of Software in GPS Functionality
The GPS system on any device isn’t just about hardware components receiving satellite signals. Software interprets these signals, calculates precise positioning, and then presents this information in a user-friendly manner.
Efficient software can even enhance weak signals or predict satellite positions to speed up connection times. However, bugs or incompatibilities in the software can hinder these processes, leading to malfunctions or inaccuracies.
Implications of Outdated Software
- Security Risks: Older software versions might have known vulnerabilities that can be exploited by malicious entities.
- Performance Issues: Outdated software might not be optimized for current hardware or might contain unresolved bugs, leading to slower performance or unexpected crashes.
- Incompatibilities: As third-party apps and services evolve, they might become incompatible with older software versions, causing them to malfunction or not work at all.
Checking and Updating Software
To ensure your device’s software is current, follow these steps:
- Navigate to your device’s settings menu.
- Look for sections labeled ‘About,’ ‘Software Update,’ or ‘System Update.’
- Within this menu, you’ll typically find information about your current software version and options to check for updates.
- If an update is available, ensure your device is connected to a reliable Wi-Fi network and has sufficient battery. Then, initiate the update process.
- After updating, restart your device to ensure the new software integrates smoothly.
Manufacturer Websites and Software Updates
Device manufacturers often provide software updates and firmware patches on their official websites. Users can download these updates to their devices manually.
This is especially common for specialized equipment or devices not connected to traditional app stores. Always refer to official sources to avoid counterfeit or malicious software.
Step 3: Inspect Physical Damage
Accidental drops, impacts, or even prolonged exposure to adverse conditions can damage your device’s internal GPS module. While external damages might be evident, internal damages are harder to diagnose.
However, if you’ve recently encountered a situation where your device was subjected to potential harm, consider getting it inspected. A malfunctioning GPS could be a sign of more extensive internal damage.
Click here for more articles like this – GPS Problems: Your Complete Guide to Common Issues and Solutions
Step 4: Restart Your Device
In the realm of troubleshooting electronic devices, one of the most universally recommended steps is to simply turn the device off and on again.
The act of restarting, while seemingly basic, can resolve a multitude of underlying issues that aren’t immediately apparent to the user. Let’s delve into why this is often the case, especially in relation to GPS functionalities like with the xoss g+ device.
The Science Behind a Restart
Every electronic device operates on a combination of hardware and software. Over time and with extended use, minor errors or inconsistencies can crop up in the software operations. These errors can accumulate, leading to unexpected behaviors or malfunctions.
- Memory Clearing: Restarting a device clears out its RAM (Random Access Memory). This can help remove any lingering processes that might have been consuming system resources or interfering with other applications.
- Software Reset: During a restart, the device’s operating system is reloaded, which can rectify minor glitches or software conflicts that developed during prolonged usage.
- Hardware Reset: On the hardware side, a restart can also help recalibrate sensors and establish fresh connections, which is particularly important for systems like GPS.
Steps to Restart Your Device
While the process to restart a device is generally intuitive, here’s a basic guideline:
- Press and hold the power button on your device. This is usually located on the side or top of most devices.
- Wait for a menu to appear on the screen with options like ‘Power Off’ or ‘Restart.’
- Select ‘Restart.’ If only ‘Power Off’ is available, select it and wait for the device to shut down completely. Then, press the power button again to turn it back on.
- Wait for the device to go through its startup sequence. Once fully booted, check the functionality of the GPS or any other components that were previously malfunctioning.
Post-Restart Considerations
After a restart, it’s essential to monitor the device to ensure that the issue has been resolved. If the GPS or any other function still doesn’t work as expected, it’s an indication that the problem might be more profound than a mere temporary glitch, necessitating further troubleshooting steps.
Step 5: Reset GPS Data
GPS data stored on your device can sometimes become corrupted or misconfigured, leading to issues such as the “xoss g+ gps not working” problem. Resetting this data can clear any discrepancies and restore optimal GPS functionality.
Why Resetting GPS Data Helps
Over time, and through regular use, your device accumulates a variety of data related to GPS functionality. This includes cached locations, saved coordinates, and other related information.
While this data helps speed up location services and provide personalized experiences, it can sometimes lead to inaccuracies or conflicts. By resetting the GPS data, you’re essentially giving the GPS system a fresh start, eliminating any data that might have been causing issues.
Considerations Before Resetting
- Data Loss: Resetting GPS data might lead to the loss of saved locations or preferences, such as frequently visited places or custom navigation settings.
- Re-establishing Connection: After the reset, the device will need some time to re-establish a connection with GPS satellites and recalibrate. This might take a few minutes, especially in areas with weaker signals.
- Backup: While the primary focus is on GPS data, always ensure you’ve backed up any essential information before performing resets of any kind on your device.
Steps to Reset GPS Data
While the exact method varies based on the device and its operating system, here’s a general process:
- Navigate to the device’s settings menu.
- Locate the ‘Location’ or ‘GPS’ settings.
- Within this menu, look for options such as ‘Clear Cache’ or ‘Reset GPS Data.’
- Confirm the reset when prompted.
- Once done, restart your device to ensure changes take effect.
- Test the GPS functionality in an open area with a clear sky to allow the device to reconnect efficiently with satellites.
If you’re uncertain about the specific steps for your device, consult the user manual or refer to online forums and guides tailored for your device model. Manufacturers’ official websites often provide step-by-step guides for such procedures.
Step 6: Ensure Clear Satellite Visibility
GPS, which stands for Global Positioning System, relies on signals from satellites orbiting Earth to determine a device’s precise location. For the system to work effectively, it’s crucial that your device has an unobstructed line of sight to these satellites.[7] Let’s delve deeper into the importance of clear satellite visibility and how various factors can impede this connection.
How GPS Works
At its core, the GPS system consists of a network of at least 24 satellites, but often more, that orbit the Earth. Your GPS device communicates with multiple of these satellites simultaneously. By calculating the time it takes for each signal to reach the device, it can triangulate its exact position on the planet.
Barriers to GPS Signal
Several factors can interfere with the signals between your device and the satellites:
- Physical Obstructions: Tall structures like buildings and bridges, or natural barriers such as mountains or dense tree canopies, can block or reflect GPS signals, leading to inaccuracies or signal loss.
- Indoor Locations: GPS signals find it challenging to penetrate through walls, ceilings, or floors. Hence, indoor locations like homes, offices, or shopping malls often have weakened or no GPS signal.
- Weather Conditions: While GPS is designed to work in all weather conditions, extreme atmospheric disturbances, like solar flares or thunderstorms, can affect signal quality.
- Urban Canyons: In densely built-up urban areas, signals can bounce off buildings, creating a phenomenon known as ‘multipath error,’ where signals take indirect paths to reach the GPS device, leading to inaccuracies.
Improving Satellite Visibility
If you suspect that obstructions are affecting your GPS signal, here are steps to improve the connection:
- Move to an open space, free from tall structures or dense vegetation.
- If indoors, try positioning your device near a window, which might allow it to catch a clearer signal.
- Avoid using the GPS in locations known for signal disruptions, such as narrow city streets surrounded by tall buildings.
- Consider purchasing an external GPS antenna. These are designed to enhance signal reception, especially in challenging environments.
- Give the device time. Sometimes, all it takes is a few extra moments for the device to recalibrate and establish a strong connection with the satellites.
Step 7: Check for External Interferences
External interferences, particularly from other electronic devices, can be a major cause of GPS disruptions.
Electronic gadgets emit electromagnetic fields, and when these fields overlap, they can lead to signal interference, causing malfunctions in devices like the xoss g+ GPS.
Understanding Electromagnetic Interference (EMI)
EMI, or Electromagnetic Interference, refers to the disruption of operation in an electrical device due to external electromagnetic fields.
All electronic devices emit some form of electromagnetic radiation, and when two or more devices are in close proximity, there’s a chance their emissions can interfere with each other’s normal operation.
Common Sources of Interference
While Wi-Fi routers are commonly known culprits, several other devices can cause interference:
- Mobile Phones: Given their communication capabilities, mobile phones frequently send and receive signals, potentially causing interference with nearby devices.
- Bluetooth Devices: Bluetooth operates on the 2.4 GHz frequency, which is shared with many other devices, including Wi-Fi routers and some GPS devices.
- Wireless Headsets and Speakers: These devices, especially when actively paired with another gadget, can contribute to electronic congestion.
- Other GPS Devices: If you have multiple GPS devices operating concurrently, their signals might compete, leading to potential interference.
- Home Appliances: Surprisingly, even devices like microwaves can interfere with wireless signals given the right conditions.
Resolving the Interference
If you suspect that external interferences are causing the “xoss g+ gps not working” issue, here are steps to help isolate and resolve the problem:
- Move your xoss g+ device away from other electronic devices. Increase the distance and observe if the GPS functionality improves.
- Temporarily turn off suspected devices. This can help pinpoint the source of interference.
- Consider changing the channels on your Wi-Fi router. Some routers automatically pick the least congested channel, but manually selecting one might yield better results, especially in areas with many networks.
- If using Bluetooth devices, try disconnecting them to check if they’re the source of the problem.
- Reposition your device. Sometimes, simply changing the orientation or position of your GPS device can improve signal reception.
Step 8: Factory Reset (Use as Last Resort)
When facing persistent issues with your device, such as the “xoss g+ gps not working” problem, a factory reset can sometimes be the solution.
However, it’s essential to approach this process with caution, as it will return your device to its original state, wiping all data and settings. Here are the steps to perform a factory reset safely:
1. Understand the Implications
Before proceeding, grasp the full scope of a factory reset. You will lose all data, apps, settings, and personal preferences on the device. Ensure you’re prepared for this outcome and that a reset is genuinely your last resort.
2. Backup Essential Data
Begin by backing up important files, photos, contacts, messages, and any other critical data. Utilize cloud services like Google Drive, iCloud, or external storage solutions to ensure you don’t lose vital information.
3. Charge Your Device
Make sure your device has a sufficient charge, preferably more than 50%. This ensures that the device doesn’t shut down during the reset process, which can lead to complications.
4. Locate the Factory Reset Option
Navigate to your device’s settings. The exact path might vary based on the device and its OS, but commonly, it’s found under ‘System’ > ‘Reset’ > ‘Factory Reset’ or ‘Erase All Content and Settings’.
5. Initiate the Reset
Follow the on-screen instructions to start the factory reset. Confirm any prompts that appear. The device might restart several times during the process, so be patient.
6. Set Up the Device
Once the reset completes, you’ll be greeted with the device’s initial setup screen. Follow the steps to configure the device, set up your accounts, and restore your backups as needed.
7. Update the Device Software
Since the device is now in its original state, it might not have the latest software updates. Navigate to the device settings and check for updates. Install any that are available to ensure optimal performance and security.
8. Reinstall Apps and Personal Preferences
Remember, all your apps were removed during the reset. Visit your device’s app store to download and install necessary applications. Additionally, customize settings and preferences to your liking.
9. Monitor GPS Functionality
After the reset and setup, test the GPS functionality. If the “xoss g+ gps not working” issue persists, it’s likely a hardware problem, and professional help might be required.
Note: Always refer to your device’s user manual or official support channels for specific instructions related to factory resets. Each device or operating system might have slightly different procedures.
Conclusion: xoss g+ gps not working
Troubleshooting the “xoss g+ gps not working” issue necessitates a methodical approach. By following the steps provided, you enhance your chances of identifying and resolving the problem.
If the issue persists, reaching out to the manufacturer or seeking professional assistance is recommended. Remember, technology is fallible, but with the right guidance, most problems are solvable.